Monday, April 29, 2019
Stripey Nursing Dress
This is the Turn About the Room Dress, a free pattern from the DIY Maternity blog. I cut out the small/medium size (with a few modifications to the skirt) as part of my Me-Made-May challenge last year, right before my baby was born. I sewed it up in little snatches of time last summer, and have worn it a bunch since then. It works well for nursing (with a nursing camisole under it), and I get lots of compliments on it - people tend to be amazed that I made it. It's very comfortable.
I changed the sizes of the skirt panels because I wanted to wear the dress as a nursing dress instead of a maternity dress, so I wanted less fullness in front (and more fullness in back, because I have wide hips). I also lengthened the skirt, because I am tall. In the end, I decided to cut the front and back panels exactly the same: 13" wide on the fold (for 26" total width) by 33" long. I also added pockets, using the Washi Dress extra pocket pattern piece.
The dress went together pretty easily, and I liked the hem technique the tutorial suggests - using a narrow strip of knit interfacing to stabilize the hem. I hemmed the sleeves and skirt with a wide twin needle, using wooly nylon in the bobbin. I ended up needing to take several inches of width out of the bodice and shorten the twist bands significantly, as the whole thing was too wide. On the other hand, the sleeves are a bit too narrow for me. They're fine, but if I were to make it again I would do a wide-bicep adjustment to make them more comfortable.
Friday, March 22, 2019
Another baby quilt
This is a baby quilt I made for some college friends of my husband's last summer. Their baby was born the same week as mine, and I worked on the quilt off and on through the summer (often with my baby asleep in the bouncer chair next to my sewing desk).
I got the idea for the pattern from a quilt in a blog post I read last spring, but I didn't love the way the pinwheels were arranged in that quilt. Instead, I chose 5 blocks from an old modern half-square triangle quiltalong, and made them 8" square. I found this awesome paper airplane print for the back, and some typewriter keys for the binding (the mother is an archivist, so I thought she would get a kick out of those prints).
Then I quilted the HST blocks in the ditch and filled in each of the large bars with a different FMQ design.
I'm pretty happy with how it turned out!
I got the idea for the pattern from a quilt in a blog post I read last spring, but I didn't love the way the pinwheels were arranged in that quilt. Instead, I chose 5 blocks from an old modern half-square triangle quiltalong, and made them 8" square. I found this awesome paper airplane print for the back, and some typewriter keys for the binding (the mother is an archivist, so I thought she would get a kick out of those prints).
Then I quilted the HST blocks in the ditch and filled in each of the large bars with a different FMQ design.
I'm pretty happy with how it turned out!
Thursday, January 10, 2019
Sheepie Sweater
I knit this sweater for my baby last Spring - I had it all finished except the button plackets before he was born, and I finished the plackets and sewed the buttons on sometime in June. (It was pretty much the only knitting I did between when the baby was born and the end of the Fall semester.)
I used Melissa Kemmerer's Sheepish Little Sweater Light pattern and Cascade Heritage sock yarn that my mom had leftover after knitting me a pair of sheepie socks for my birthday. The only major change I made to the pattern was to add a button placket along one of the raglan lines - I got the idea from some sweaters that the Yarn Harlot had knitted for her nephew many years ago, and I'm really glad I did because otherwise the neckhole would have been way too small to get over the baby's head. I think I did make some modifications to the pattern having to do with gauge and size, but I can't remember what they were at this point. I think I tried to aim for finished measurements in the 12 month size, and that worked out pretty well. The sweater has fitted him this fall and winter, although the sleeves are still too long.
I'm really proud of this sweater, and I had planned to enter it in the state fair at the end of the summer, but in my sleep-deprived haze I missed the drop-off day for fair entries. I was really disappointed, but I'll have to knit something else equally awesome to enter next year instead.
I used Melissa Kemmerer's Sheepish Little Sweater Light pattern and Cascade Heritage sock yarn that my mom had leftover after knitting me a pair of sheepie socks for my birthday. The only major change I made to the pattern was to add a button placket along one of the raglan lines - I got the idea from some sweaters that the Yarn Harlot had knitted for her nephew many years ago, and I'm really glad I did because otherwise the neckhole would have been way too small to get over the baby's head. I think I did make some modifications to the pattern having to do with gauge and size, but I can't remember what they were at this point. I think I tried to aim for finished measurements in the 12 month size, and that worked out pretty well. The sweater has fitted him this fall and winter, although the sleeves are still too long.
I'm really proud of this sweater, and I had planned to enter it in the state fair at the end of the summer, but in my sleep-deprived haze I missed the drop-off day for fair entries. I was really disappointed, but I'll have to knit something else equally awesome to enter next year instead.
Monday, January 7, 2019
Changing pad liners
When my husband and I were putting together our baby registry, one thing we added (and then received) was a set of changing pad liners, with the idea that when the baby pees during a diaper change, you only have to wash the liner and not the whole changing pad cover. It's a great idea, but we found that the commercial liners didn't wash well at all.
I replaced them with a set of 5 homemade liners. They have PUL backing (the same material that cloth diaper covers/exteriors are made from) and a cotton flannel face. I cut the two layers into 12.5"x26" rectangles (this makes them a little bigger than the commercial ones, which is nice), and then traced around a small plate to round the corners. I used wonder clips to clip the two layers together, right sides out, and serged around the edge.
I made two sets of 5 liners: one set for us, and another set for some friends who have a baby the same age. The white PUL that JoAnn sells is 64" wide, so a yard and a half of it was enough for both sets. The ones pictured here are made with flannel I had in my stash, and I bought some more flannel to complete our set.
These were quick and easy, and we use them a ton! I'm getting ready to make two more sets for two families in our friend-circles who are expecting babies this month. I think 1.5 yards of extra-wide PUL and 2.75 yards of 44" wide flannel is the right amount to buy to make two sets of 5 changing pad liners.
I replaced them with a set of 5 homemade liners. They have PUL backing (the same material that cloth diaper covers/exteriors are made from) and a cotton flannel face. I cut the two layers into 12.5"x26" rectangles (this makes them a little bigger than the commercial ones, which is nice), and then traced around a small plate to round the corners. I used wonder clips to clip the two layers together, right sides out, and serged around the edge.
I made two sets of 5 liners: one set for us, and another set for some friends who have a baby the same age. The white PUL that JoAnn sells is 64" wide, so a yard and a half of it was enough for both sets. The ones pictured here are made with flannel I had in my stash, and I bought some more flannel to complete our set.
These were quick and easy, and we use them a ton! I'm getting ready to make two more sets for two families in our friend-circles who are expecting babies this month. I think 1.5 yards of extra-wide PUL and 2.75 yards of 44" wide flannel is the right amount to buy to make two sets of 5 changing pad liners.
Saturday, October 20, 2018
Dinosaur baby quilt with scientific integrity
One of my best friends from college has a baby exactly 12 weeks older than mine. While we were pregnant, I offered to make a quilt for her baby, and asked if she and her husband had any theme or color requests. They asked for a dinosaur quilt with blues, greens, and yellows, but no purple.
I immediately started searching the internet, and found these amazing paper-pieced dinosaur blocks. Robert helped me choose three of the blocks, and I just bought those three patterns individually rather than the whole bundle. All three of these dinosaurs - the pteranodon, velociraptor, and triceratops - are from the cretaceous era. Since my friend is a scientist, we didn't want to send her baby a quilt that mixed dinosaurs from different eras (hence the scientific integrity).
I used some scraps from my stash and supplemented with some fabric from my local quilt shop. It turns out the owner of the shop really likes dinosaur novelty fabric, so she had a great selection for me to choose from, and was very excited to hear about the dinosaur baby quilt!
The quilt is large for a baby quilt - if I'm remembering right, it finished at about 42" x 52". The patchwork squares are 3" finished, and I had half a yard of the dino fossil fabric in the horizontal stripes. I quilted a diagonal grid in the patchwork and dinosaur sections and parallel horizontal lines in the fossil stripes. By the time I was done with the piecing, I wanted to quilt in a way that would be relatively easy and not detract from the dinos.
I'm thrilled with how this quilt turned out, and my friend and her husband were, too!
I immediately started searching the internet, and found these amazing paper-pieced dinosaur blocks. Robert helped me choose three of the blocks, and I just bought those three patterns individually rather than the whole bundle. All three of these dinosaurs - the pteranodon, velociraptor, and triceratops - are from the cretaceous era. Since my friend is a scientist, we didn't want to send her baby a quilt that mixed dinosaurs from different eras (hence the scientific integrity).
I used some scraps from my stash and supplemented with some fabric from my local quilt shop. It turns out the owner of the shop really likes dinosaur novelty fabric, so she had a great selection for me to choose from, and was very excited to hear about the dinosaur baby quilt!
The quilt is large for a baby quilt - if I'm remembering right, it finished at about 42" x 52". The patchwork squares are 3" finished, and I had half a yard of the dino fossil fabric in the horizontal stripes. I quilted a diagonal grid in the patchwork and dinosaur sections and parallel horizontal lines in the fossil stripes. By the time I was done with the piecing, I wanted to quilt in a way that would be relatively easy and not detract from the dinos.
I'm thrilled with how this quilt turned out, and my friend and her husband were, too!
Thursday, August 16, 2018
A Nursing Washi Dress
I made the size medium, which is the same size I made my first Washi dress in. (I tried that one on near the end of my pregnancy, to make sure the bodice still fit, and it did - then. Now the bodice is *very* snug, but it works.) I made it sleeveless, and trimmed a bit off the straps. I more or less followed this tutorial for a button-front Washi (the blog seems to no longer be on the internet, but the text at least is still available on the web archive). It is lined in the bodice only, and I made three parallel casings for narrow elastic at the back bodice, instead of shirring. The dress is a lovely soft Alison Glass double gauze, and the lining is the same blue voile I used to line my first Washi. I decided on a whim to topstitch with hot pink thread. The topstitching isn't super visible in the pictures, or from far away, but up close the pink topstitching in combination with the pink Kam snaps really make the dress.
If I were to make another nursing Washi, I think I would size up in the bodice and raise the neckline a little bit, since nursing bras tend to have full coverage and sometimes I worry about the edge of my bra peeking out from the neckline. But on the whole, this has been a perfect dress to wear to church or just out of the house this summer, and I think with a cardigan, wool tights, and a slip it will be cozy for fall and winter, too!
Sunday, June 10, 2018
Maternity Sewing
At the beginning of my pregnancy (and before I got pregnant) I had grand visions of all of the maternity clothes I was going to sew for myself - Megan Nielsen's maternity patterns, clothes from the DIY Maternity blog, and other things I'd seen on the internet. In the end, even though my pregnancy was for the most part easy and super-smooth, I was really tired and I didn't have the energy or the time to sew much of anything.
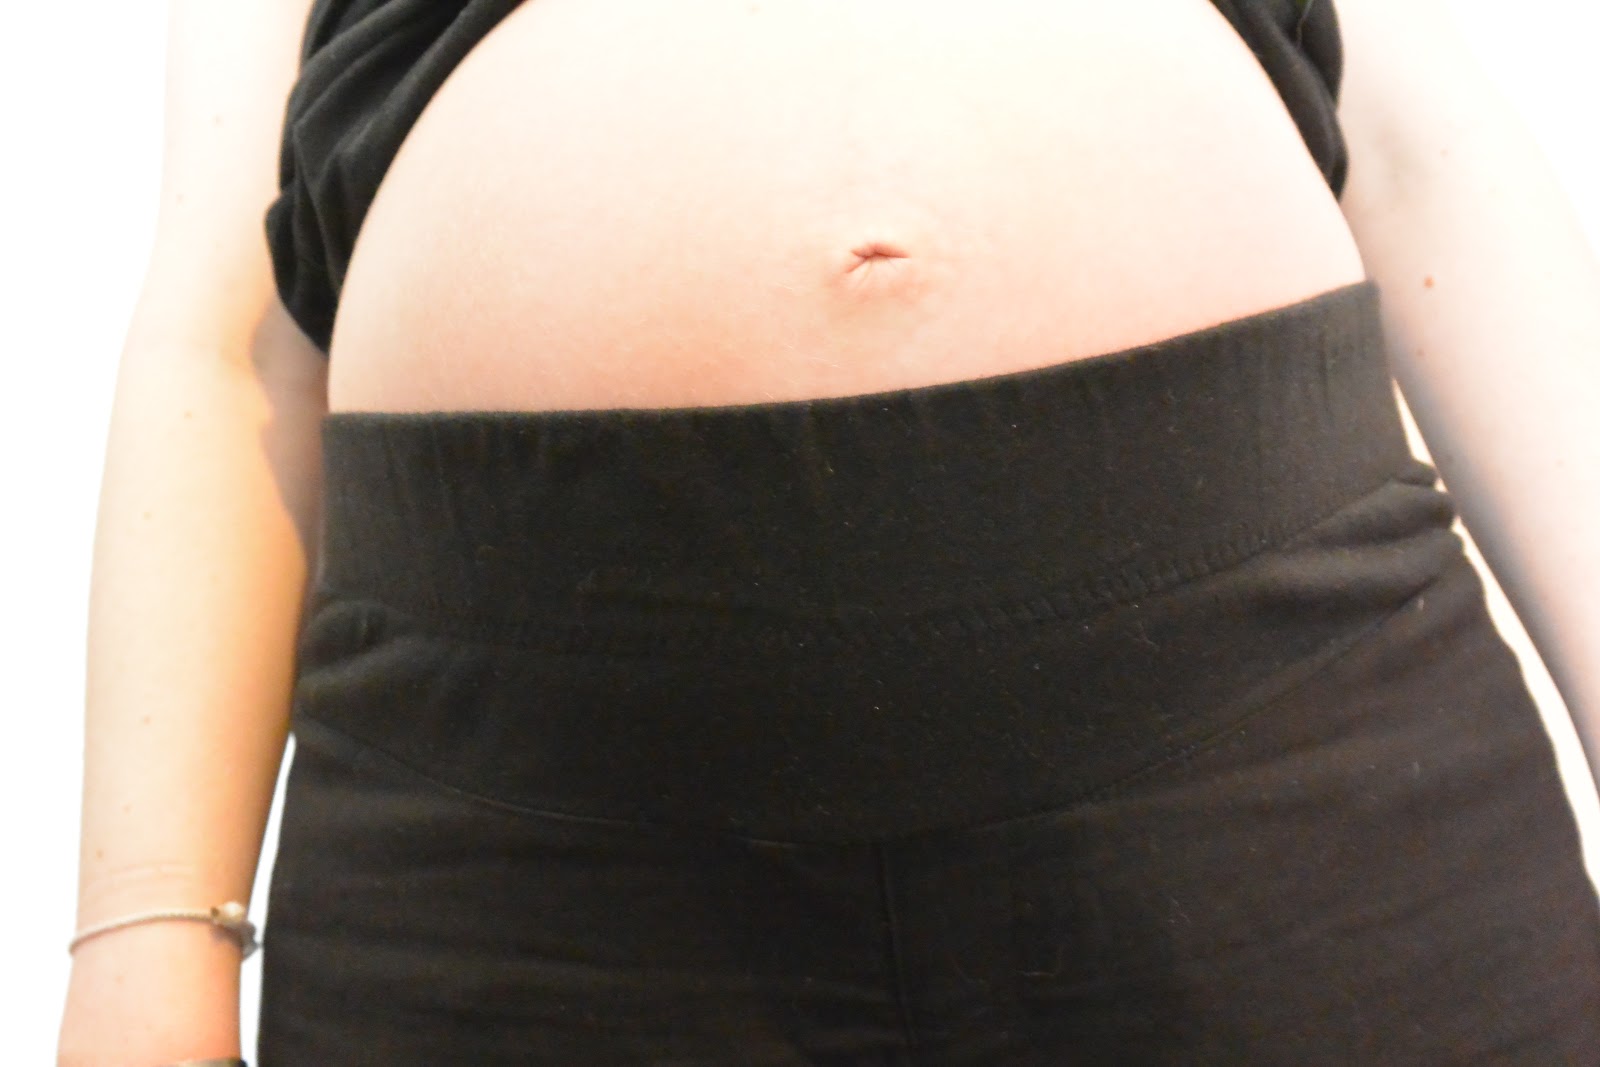
I ended up sewing one thing from scratch (the Cordelia maternity camisole from So, Zo) and re-making one thing (a pair of black maternity slacks from a pair of regular non-maternity pants). These pictures were taken at about 34 or 35 weeks of pregnancy.
The camisole was another piece that I wore all the time - I had a few sweaters that I wore with this underneath. I made a straight size 14, and the construction was pretty quick and straightforward. I was a little nervous about the foldover elastic, but this tutorial was helpful, and in the end it wasn't too bad. I used cheap foldover elastic from JoAnn, and it hasn't washed and worn as well as you'd hope. Next time, I would order higher quality elastic online.
I really like this pattern. The camisole was really comfortable - I like the wide bottom hem band, and there was plenty of room for my belly to be comfortable until the very end of my pregnancy.
I ended up sewing one thing from scratch (the Cordelia maternity camisole from So, Zo) and re-making one thing (a pair of black maternity slacks from a pair of regular non-maternity pants). These pictures were taken at about 34 or 35 weeks of pregnancy.
For the pants, I referred to a few tutorials on the internet, but mostly modeled them off of a pair of maternity jeans I bought at Goodwill. The jeans had a wide elastic waistband in a knit casing that felt like cotton spandex. I used about a yard of 2-inch elastic that I already had on hand and some black 90% cotton/10% spandex knit that I got at JoAnn. I bought a pair of Banana Republic stretch wool pants from ThredUp (the same brand and a similar style to the three pairs of pants I've been wearing to work for the past few years) two sizes larger than I usually wear.
I picked out the zipper and removed the waistband of the pants, and then I marked out and stitched along a curve in front that would fit under my belly. I topstitched down what remained of the fly. Then I cut a piece of jersey about 9 inches long and the width of the new waist opening of the pants and serged it into a tube. I checked the length of the elastic around my belly and sewed the ends together (overlapping them about an inch). Then I folded the new waistband in half, right sides out, and slipped in the elastic, then zig-zagged along the lower edge of the elastic, through all 3 layers, to hold it in place and keep it from twisting later. I serged the new waistband to the pants opening, pressed the seam allowance toward the pants, and finished by topstitching to stabilize the pants and hold the seam allowance in place.
Then I wore the pants two or three times a week until the end of the semester. For most of my pregnancy, wide elastic waistbands like the one on these pants were more comfortable for me than the full belly panels. But for the last few weeks, my belly was big enough that it was pushing these waistbands down, and I found the full panels more comfortable. Luckily, that change happened right about at the end of the semester, at the same time that a church friend who had her baby lent me several pairs of full panel jeans, so because I no longer needed to dress up to teach, I could just wear those most of the time.
The camisole was another piece that I wore all the time - I had a few sweaters that I wore with this underneath. I made a straight size 14, and the construction was pretty quick and straightforward. I was a little nervous about the foldover elastic, but this tutorial was helpful, and in the end it wasn't too bad. I used cheap foldover elastic from JoAnn, and it hasn't washed and worn as well as you'd hope. Next time, I would order higher quality elastic online.
I really like this pattern. The camisole was really comfortable - I like the wide bottom hem band, and there was plenty of room for my belly to be comfortable until the very end of my pregnancy.
Subscribe to:
Posts (Atom)