Showing posts with label kid stuff. Show all posts

Sunday, January 31, 2021

Santa's Little Mask Workshop


I made a lot of cloth masks in December!  My kids' daycare started having the kids (age 2 & up) and staff wear masks in mid-November, so I wanted to make my 2-year-old some fun masks that he would enjoy wearing - we'd been having him wear a mask on the (very rare) occasions that we visited with friends outdoors, but not for school - it didn't seem reasonable to try to get him to be the only person at the daycare to wear a mask.  


I bought two Moda "Safety First" mask panels, each of which had 10 kid-sized and 8 adult-sized mask fronts.  I made up the Christmas panel first, and I'm now in the process of making up the non-holiday ones.  I tried out several different construction methods for both the kid and adult masks, before settling on our favorite style.

For the non-holiday masks, I'll: 
  • put the front and linings right sides together (I'm making the kids masks double-layered for ease of breathing but triple-layering the adult ones) and stitch the top and bottom with a scant quarter inch seam allowance
  • turn right-sides out, press, and topstitch the top and bottom edges
  • press in the pleats as directed in the panel instructions (basically a box pleat, most of the adult masks are done this way in the second picture above)
  • for the kids' masks, bind the side edges with double-fold bias binding and thread about 18" of very soft lingerie elastic through.  Tie a knot and use a lighter to singe the very ends of the elastic
  • for the adult masks, I'm cutting the two layers of lining 6x7" (for a 6x9" outer layer) so that after pleating I can fold the outer layer back and tuck the raw edge under to make a casing on each side.  Then I thread a continuous 1-yard length of 3/8" grosgrain ribbon through the casings.
We prefer masks that fasten around the back of the head instead of the ones with ear loops (although we do have a few ear loop ones that a family member sewed for us, and we like those for quick errands because they're easier to put on and take off).  For adults, the ribbon ties are adjustable to get a better seal around the face, and for both adults and kids it's nice to not have the ear loops putting pressure on our ears.  


Friday, June 5, 2020

Toddler Jammies

 For his second birthday, I made my toddler two pairs of summer pajamas.  The pattern is Peekaboo Patterns Alex & Anna pajamas, which has short, long, and sleeveless options.  My son is currently wearing 2T clothing, but he's in bulky cloth diapers.  His chest measurement put him in the 2T top, and his hip measurement around his night-time diaper put him in the 3T shorts, but I decided to make him the 4T top and shorts in the hopes that they'll fit him for at least two summers. 
The main fabrics are from a grab box I ordered from Fabricworm fabrics a few months ago.  The blue fish are a 95% cotton, 5% spandex jersey.  It was wide, so I was able to cut the whole set out of just half a yard!  I still have a second piece, which is about a yard.  The giraffes are an interlock knit, and it seems pretty stretchy, although the selvage didn't include a label or fiber content.  It wasn't quite as wide, but I still do have some leftover for something else - which is nice, because we love giraffes!  The interlock was very easy to sew.  I cut the contrasting bands on both pairs from scraps leftover from the two pairs of maternity leggings I made myself last winter. 
I constructed these almost entirely on my serger.  The instructions were very clear, and they went together pretty quickly and easily, although it would have been nice if there were notches to help with setting in the sleeves.  The only elastic I had was non-roll elastic (and I couldn't buy any other elastic because people pandemic-panic-bought all of the elastic!), so I couldn't sew the elastic directly to the top of the shorts as instructed.  Instead, I made a snug casing with a tiny seam allowance (so as not to reduce the rise) and threaded the non-roll elastic through.  I stuck a little folded scrap of the pink jersey into the back waist of each pair of shorts so that my husband and son will be able to identify the front and back (the shirts have the neckband seam at the back, so I figured the fake tag wasn't necessary there).  I intended to hem the shirt and topstitch the band seams with a double needle, but then I stupidly broke the double needle by installing it in my machine without checking that the needle was centered.  Instead, I hemmed the shirts with a zigzag stitch and decided not to topstitch the band seams.

Tuesday, January 7, 2020

Handmade Christmas 2019

 This year I was much more ambitious with handmade Christmas gifts than I was last year!  I made three different types of handmade gifts, all in multiples.  The first was eight pairs of tea towels with two of my grandmother's recipes on them, in her handwriting.  This gift was a long time in the making - when we visited my grandma LAST Christmas, I asked her for her cornbread and pecan crescent cookie recipes.  Then I photographed them, uploaded them to Spoonflower, and followed the Spoonflower tutorial for making family recipe tea towels.  We gave them to all of the households on my mom's side of the family, and I think they were a hit - since we live far away, I didn't get to see anyone but my mom open them.
 My one disappointment was that the Spoonflower fabric didn't seem to be printed on the straight grain.  This is the first time I've ordered from Spoonflower, and I don't know if that's typical or if it was some sort of user error on my part, but it was a bit frustrating that I had to fudge so much when I was cutting the panels apart.  In the end, I don't think it was very noticeable in the finish product, though.  Once I had cut the panels apart, I used spray starch to help get crisp folds on the hem (I just folded half an inch under, and then another half inch under on all four sides, and cut little squares out of the corners to reduce bulk).  I took some twill tape I found in my sewing desk and slipped it into one corner of each towel for a hanging loop.
I also made four little kid aprons for my son, my niece and nephew, and my cousin's daughter.  I used a free pattern available from Sew Liberated, which I originally saw on the Sweet Alchemy blog.  My son loves to help in the kitchen (he particularly loves baking bread), so I knew I wanted to make him an apron for Christmas.  I know my niece (6) and nephew (4) also like to help in the kitchen, so I decided to make them for all the little kids we give gifts to (our 18-month-old, our niece and nephew, and my cousin's 6-year-old).  My SIL loves Tula Pink fabric, so I decided this cute cut that I had in my stash was perfect for this application.  I didn't have enough to make the fronts and backs of all four aprons, so I used a different fabric for the linings - blue stars for the boys, and a grey/pink floral print I had in my stash for the girls.  Having different linings also helps distinguish my niece and nephew's aprons, since they're slightly different sizes.  

The pattern is intended for kids age 3-6, so I made the 4-year-old's apron exactly according to the pattern.  I made the two 6-year-old aprons the same width, but lengthened them by 2" at the bottom.  For my 18-month-old, I folded the top edge of the pattern down by 1" and took half an inch out of the center of the apron by hanging the pattern piece 1/4" over the fold when I cut it out.  I haven't seen any of the other kids in their aprons yet, but my son really loves wearing his when he helps in the kitchen - he reminds us to put it on him if we forget!
The last gifts I made this Christmas were two Open Wide zippered pouches, using a tutorial from Noodlehead.  I made the medium size, and used fabric I bought on our vacation in Hawaii just before Christmas.  These were for my husband's aunt and a friend of my mother's who spent Christmas with us.  They turned out really well and were easy to sew!  They also turned out larger than I expected - almost big enough to carry around a sock-knitting project in.  Here's a picture with a 12.5" ruler for scale.

Saturday, May 25, 2019

Process-Oriented Knitting


Since my baby was born a year ago, I've really been savoring my crafting time.  So I'm not upset to have frogged and re-started two knitting projects in the past week.  It also helps that I don't have a time deadline on these projects, so I can just enjoy the knitting process without rushing.  The first project is this striped raglan sweater.  It's a pullover version of this cardigan that I made for my niece a few years ago, and my intention is for it to fit my son this coming winter.  I've been really enjoying the knitting, and was very pleased with myself for learning a new technique for jogless stripes!  Unfortunately, it was coming out way too big (which didn't actually bother me, it will fit at some point), and I ran out of the grey yarn before I finished the first sleeve.  So I frogged it, and I've started knitting it again in a smaller size.  So far, I'm enjoying it just as much the second time.

The second project is a pair of Skew Socks in KnitPicks Felici self-striping yarn.  I started the toe, got several rounds in, and then noticed that I'd done the Turkish cast-on wrong.  I have now ripped it out and restarted.  I don't mind re-knitting this small bit of toe so that I'll have a nicer pair of socks when I'm done.

Saturday, April 14, 2018

Handmade Christmas 2017

Wow, this post is late!  I didn't plan to make very many Christmas gifts, but somehow I ended up making a bunch anyway.  This quilt was for my Grandma, and it was a team effort with my mom.  We had given Grandma the fabric and pattern for Christmas two or three years ago, but we came to the conclusion that she was never going to sew it, so we decided to do it for her.  It was relatively quick (two weekends), and fun to do together!  It came out great, and Grandma loves it.
I've done Christmas sweaters for my niece and nephew every year so far (although last year I made a flannel shirt for my nephew instead of a sweater), and I kind of thought last year was going to be the last year - they're getting big, and the sweaters are getting to be more of a production.  But then I hit on the idea of a ballet wrap sweater for my dance-obsessed niece, and I couldn't not do one more year.
I used free patterns and used worsted weight superwash wool from Valley Yarns (the Webs house brand).  They were fun to knit, and apparently were a hit with the kids.

Earlier in the Fall, I knit a pair of socks for Robert for Christmas.  He loves them, but has dubbed them "the betrayal socks," because I knit them right in front of him without telling him they were for him.  He assumed they were for me, and was surprised that I was knitting myself socks in a blue tweedy yarn.  He tells me that he resisted the urge to ask if he could have them - he did it so well that I hesitated a bit to wrap them up for Christmas, because I wasn't sure if he liked them!
And lastly, I made a few Christmas-y kitchen things for us.  I took two fat quarters of Christmas-y fabric I bought for this purpose in Fall 2016 and finally made a set of four holiday napkins for our dining table.  I also knitted three Christmas dishcloths.  One of them made its way into my mom's stocking, and we kept the other two for ourselves.


Friday, November 24, 2017

Swan Lake dress

My niece turned four in September, and I made her a Swan Lake dress.  She is really into dance and ballet right now.  It's a flutter sleeve Geranium in size 4T (if I remember correctly), with some length and width adjustments to the skirt in order to take full advantage of the border print fabric. 

I used some digitally printed fabric from Hawthorne Threads, and to be honest I didn't love it.  It was pretty stiff, and the ink was very dense on the surface of the fabric.  I don't think I would use this fabric for quilting, and it would definitely not be appropriate for any application that needs to drape.  But the prints were adorable.  I hope it will hold up okay with frequent washing. 

Tuesday, August 15, 2017

Little Polo Shirts

My nephew and grandcousin (first cousin once removed) have birthdays two weeks apart, and they turned two at the beginning of the summer.  By luck, we were visiting my family in Europe for my grandcousin's birthday, and we were able to attend his birthday party.

I made two identical little polo shirts for little boy second birthday gifts.  They're size 2T Oliver + S Parachute Polos.  They went together pretty smoothly and I was happy with how they turned out, but I don't quite like this pattern as much as I like the Sketchbook Shirt.  Part of it was that I fought with my machine hemming the knits.  I ended up using a twin needle on the sleeve hems and a triple stretch stitch on the shirt hems, and wasn't 100% happy with either one.
I also think the inside of the side vent could be a little cleaner.
I did like how the inside of the collar and plackets looked, though.

Sunday, March 12, 2017

Another Sketchbook Shirt

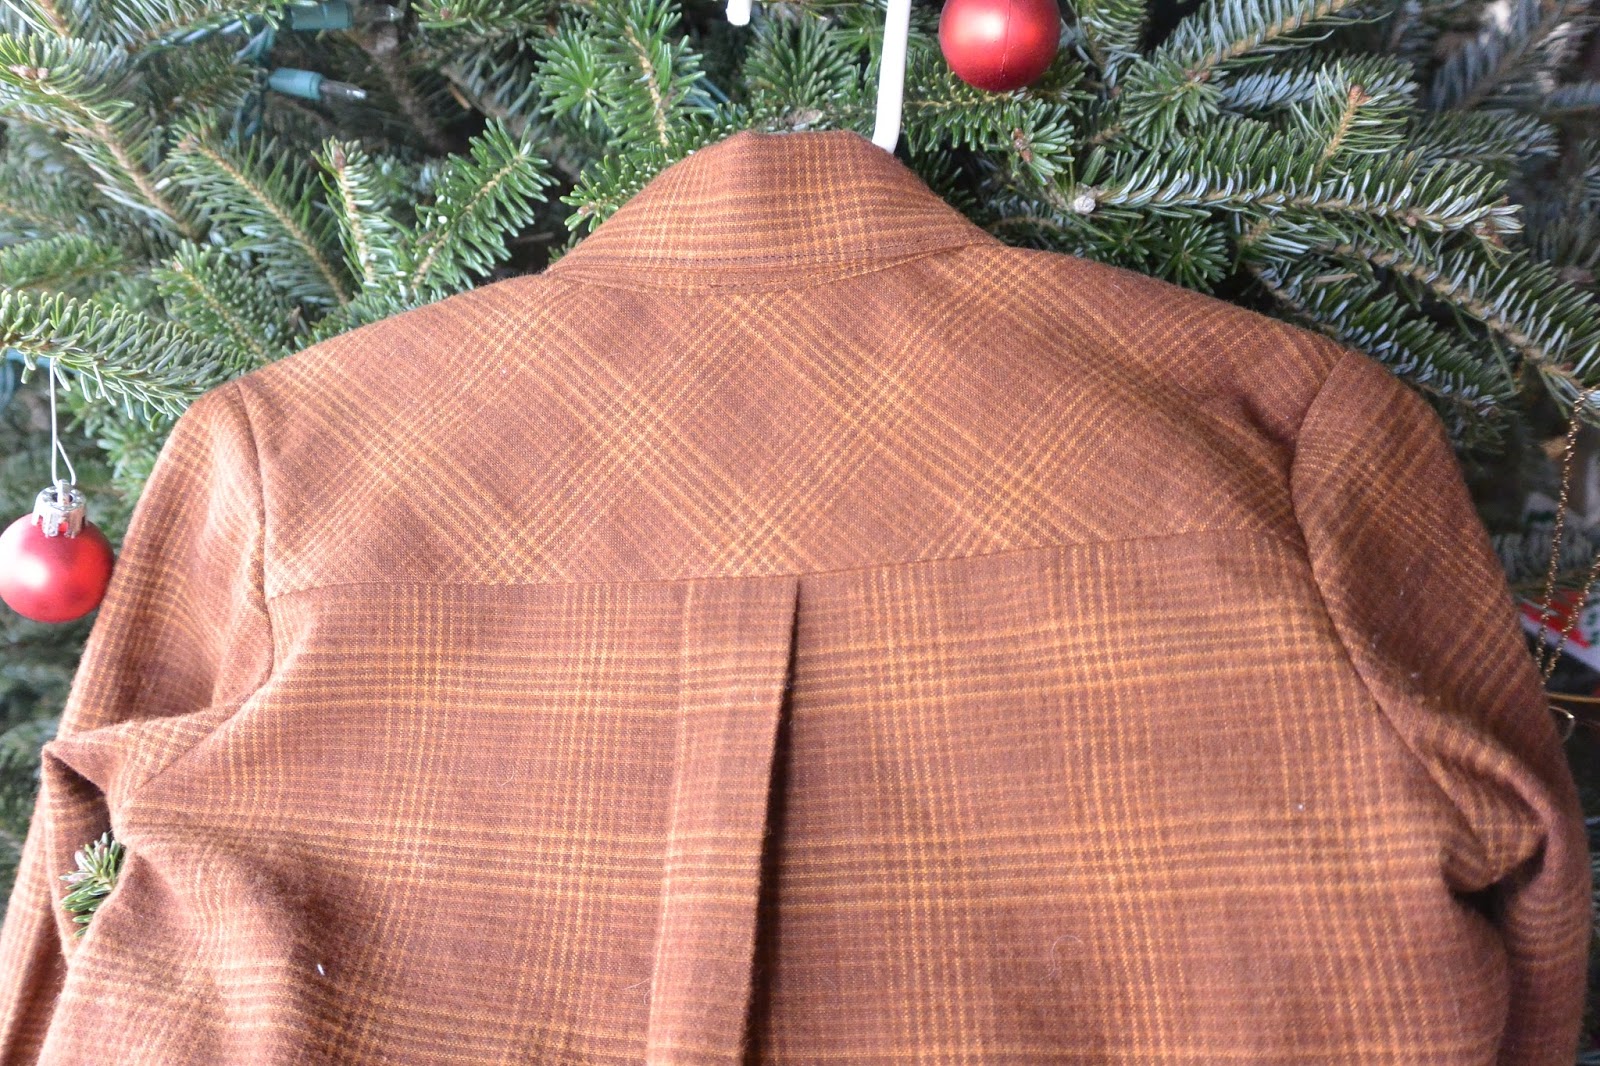
This was a Christmas gift for my nephew, who was 18 months old at the time.  It is another Oliver + S sketchbook shirt.  The first two were short-sleeved, size 12-18 months, and the second one had a 1/4 inch broad shoulder adjustment.  This one is a long-sleeved 2T with the same broad shoulder adjustment.
I was looking for a nice plaid flannel, but the fabric I ended up finding at my local quilt shop was more like a homespun kind of thing than a true flannel.  I did all french seams, including the armscyes, and cut the yokes and pocket on the bias.  I used this tutorial from Really Handmade to figure out the plaid-matching at the plackets and side seams.  I think it turned out really well!

Friday, February 24, 2017

Wowligan

This is the first of the handmade Christmas gifts I made in 2016.  A wowligan for my niece, who turned 3 last fall and loves animals, buttons, and the color yellow.  This yellow sweater has 12 owls and 27 buttons.
I bought the worsted-weight yarn before I settled on the pattern, and it is significantly heavier than what the pattern calls for, so I had to wing it on the sizing.
The circumference ended up being 24", and although I haven't seen her wear it in person, from pictures it looks like it fits.

The biggest problem I had was with the buttons that fasten the sweater closed - I forgot to do a thread shank when I sewed them on, and they were way too tight.  I couldn't even get the buttonholes around them, so I cut off the buttons and re-sewed them.  They were much better the second time, but there still wasn't really enough room between the buttons and the button-band.  Next time I'll try to do better ....


Pattern: Wowligan
Size: 24", but I used the stitch counts for the smallest size
Yarn: Rowan Pure Wool Worsted (100% superwash wool) in Buttercup, 2 skeins
Needles:  US size 8, I think
Started/Completed: December 2016/December 2016
Modifications: Used worsted rather than sport weight yarn.  I used the stitch counts for the smallest size and the length measurements from one of the larger sizes.

Saturday, February 4, 2017

A Yellow Hippopotamus Birthday Dress

I made this dress at the beginning of September, as a 3rd birthday present for my niece.  She loves yellow and animals and buttons, and I had half a yard of this yellow, pink, and green hippopotamus print that I got in a scrap pack a couple of years ago.  The dress has six buttons - three different kinds!

With only half a yard of fabric, I wasn't going to be able to make any of the dress styles I'd made for my niece in the past, so I chose the Oliver + S Ice Cream Dress.  I had to cut the pieces in one layer, but I managed to squeak out the main panels of the size 2T with a few inches of added length.
It was lucky this fabric didn't have a clear up and down, or it wouldn't have worked!

I think the dress came out cute, even if it isn't the twirly kind of style my niece usually likes.  I hope she will be able to wear it as a dress, and then as a tunic as she gets taller.  I'm glad I was able to use this little piece of cute fabric that I'd been saving for her!

Saturday, September 17, 2016

Bucket hats!

When I started making the Paddington Bear shirt for my nephew, I very quickly decided that he needed a red bucket hat to go with it - just like Paddington wears.  I had already downloaded the free Oliver + S bucket hat pattern, and it was perfect!
Of course I had to make one for my niece, too.  Hers is a yellow floral with brown floral lining.
Both hats are size Medium (3-5 years), even though my niece is almost 3 and my nephew is 15 months - the internet says the hats run small.  From pictures, it looks like the hats fit well and are adorable.

They are fully reversible, and I used this tutorial to finish them without any hand sewing. I hear that the kids like the hats.  Which is good, because the dog didn't like it at all.

Friday, September 9, 2016

Paddington Bear

Early this summer, my sister-in-law and I went and shopped the Hancock's Fabrics closing sale.  She found an adorable Paddington Bear print and asked me to sew another button-up shirt for my nephew, like the one I made for his birthday.  I asked about sizing, and she suggested that a little more room in the shoulders would be nice, so I got to try my first attempt at altering a pattern!  I added a quarter inch to each shoulder seam, as you can see in the picture above, for a total of half an inch of extra width across the shoulders.
Then I sewed up the shirt, just like the last one - except this time I remembered to use Nicole's trick of cutting the collar interfacing into two pieces to make the collar fold extra nicely.

I put the shirt in the mail last weekend, and this morning my sister-in-law sent me a picture of my nephew looking very handsome in his new shirt!

Sunday, June 19, 2016

Birthday shirt

My nephew just had his first birthday.  I wanted to make him something to wear, like I've done for his sister for each of her birthdays.  I chose the Oliver + S sketchbook shirt.  I made the 12-18 months size and it fit him - I hear he's already worn it twice!
The only modification I made to the pattern was to use snaps instead of buttons.  I figured that snaps are easier for me to put in than buttons and buttonholes, and are also easier for his parents to fasten and unfasten when they're dressing him.
I felt like a sewing rockstar when I put in the collar - I followed the instructions in the pattern, including hand basting the collar to the shirt rather than pinning, and it went very smoothly.  Next time, I will use Nicole's trick of cutting the interfacing for the collar to make it fold more nicely.  I also love the little box pleat in the back.
I think I will be making this one again as my nephew gets bigger.  And it was a great way to dip my feet into shirt sewing.  I plan to work my way up to shirtdresses and men's and women's dress shirts!

Thursday, May 5, 2016

A green giraffe dress! With buttons!

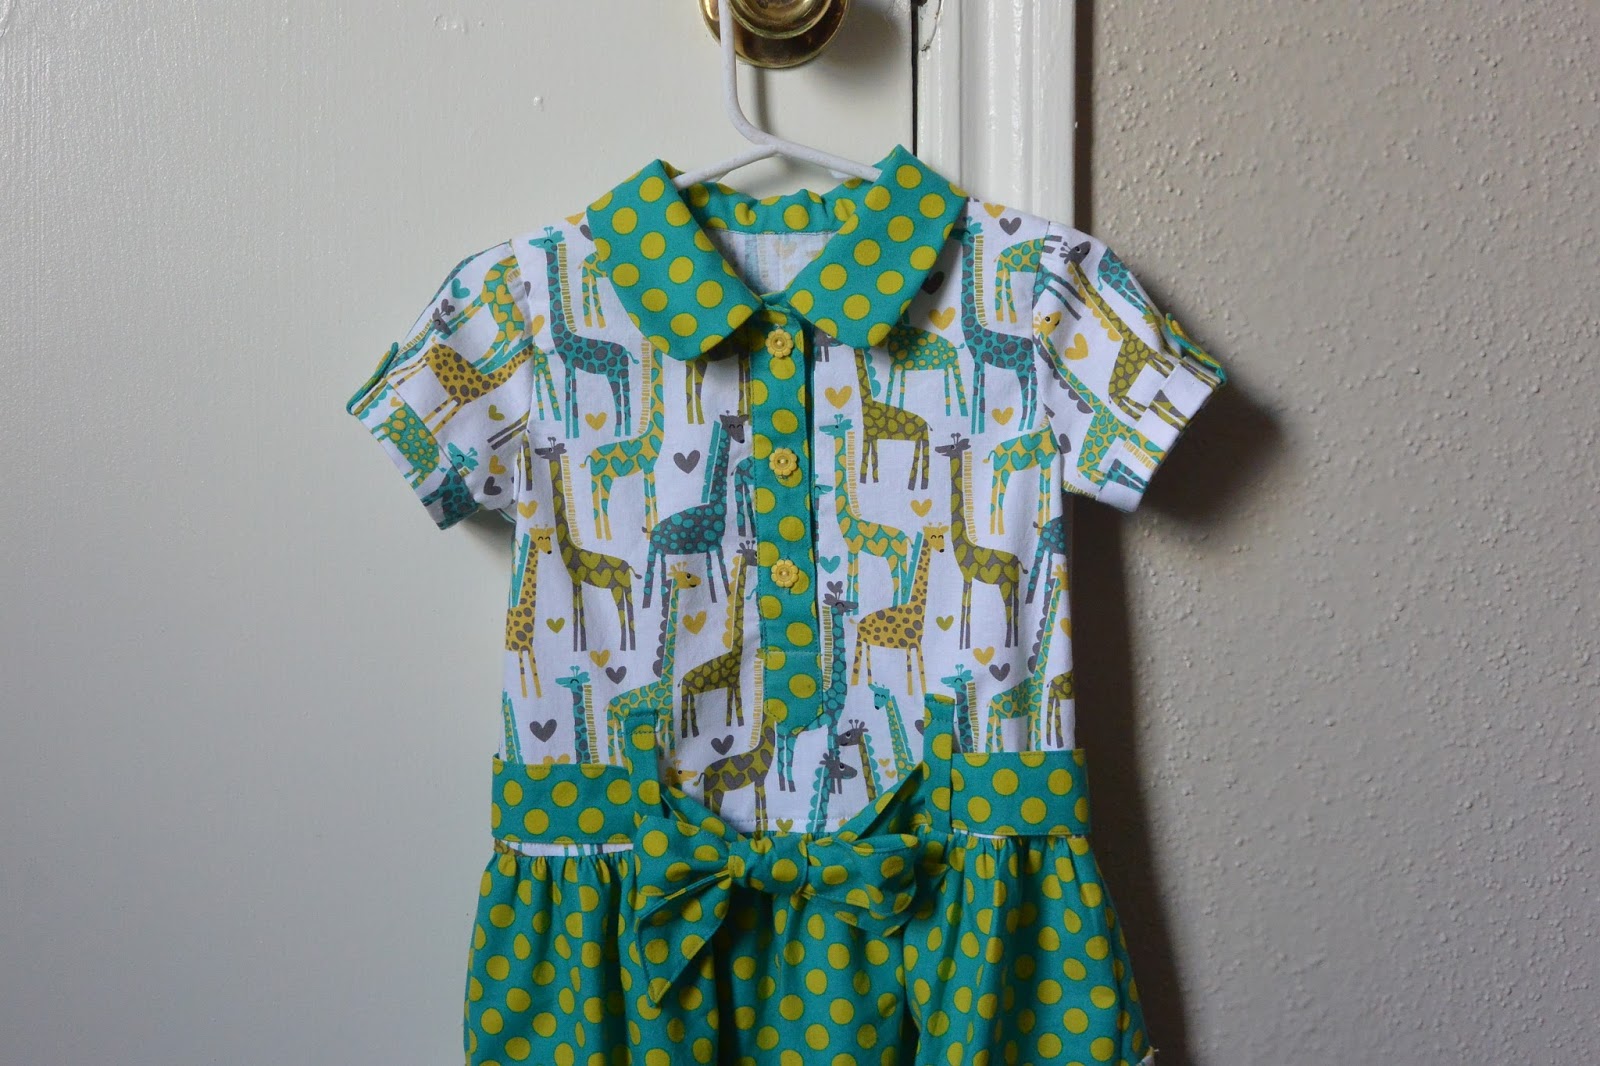
My niece's favorite animal is the giraffe.  And she is currently fascinated with buttons.  She recently asked her mom for a green giraffe dress with buttons.  So they went to the fabric store to look for green giraffe fabric, but the closest thing they could find was a flannel with yellow giraffes.

It just so happens that I also love giraffes, and I happened to have in my stash a cut of fabric with green and blue giraffes on it, together with a coordinating polka-dot.
They became an Oliver + S Jump Rope dress.  I made view A, in size 2T with some extra length - I cut the bodice on the 3T line, and then added some more to the skirt length.  I think it was at least 2", but I wasn't super-precise about it and I don't quite remember exactly what I did.
The dress has SEVEN buttons.  Three functional buttons on the placket, plus one on each sleeve tab and one on each pocket.  My niece was thrilled.  She immediately asked me to help her put it on (thank goodness it fit, and has some length for her to grow into) and mentioned several times later in the day that her dress has giraffes on it.
I've never sewn a placket before, but it wasn't too bad!  I used the Sew Mama Sew sew-along and it was very helpful.  I also asked for help estimating fabric requirements in the Oliver+S forums, and Nicole and the other ladies there were very helpful!

All in all, I am thrilled with how this little dress turned out and I had a lot of fun sewing it!

Saturday, January 16, 2016

Handmade Christmas Part 2

I made Christmas sweaters for my niece, who is 2, and my nephew, who is now 7 months old.  The one for my nephew is the 12-month size of Trellis, heavily modified for symmetry and to reduce seaming.  The yarn is Berroco Vintage, which I didn't really love knitting with.  I chose it because it's the right weight, it's machine washable, and it's only 40% wool (which means it's 60% synthetic, hence the not loving it) and for a while it looked like my nephew was going to have really sensitive skin, so I didn't want to knit him something 100% wool that he might be allergic to. Also, I really, really do love this color green.  Robert really liked the finished sweater, and tried to request one in his size.  He might eventually get one, but probably not any time soon.
For my niece, I used the kids raglan recipe from The Knitter's Handy Book of Top-Down Sweaters.  I knit the smallest size.  I was inspired by this sweater (knit by Stephanie Pearl-McPhee several years ago).  The colored yarn is Liberty Wool color #7864.  I loved knitting with this yarn.  The grey yarn is Valley Yarns Charlemont, held double.  I found these cute little star buttons that I think are perfect for this sweater.
I really kind of want a sweater exactly like this.  Too bad I already have a lot of sweaters (and plans for more sweaters that aren't this one).

Here's a picture of the back of my nephew's sweater.  It's symmetric, which makes me happy!  The one thing I'm not in love with about this sweater is the seam at the back of the collar, which is visible in this photo if you look closely.  The instructions said to graft it, which I did in stockinette after spending over an hour researching grafting in seed stitch.  Turns out a true seed stitch graft isn't possible.  This was highly disappointing to me, but I can't think of any solution.

We also received a few handmade gifts, including this succulent sitting in a knitted felted succulent sweater.  Isn't it adorable?